How to Make Windshield Gasgit Adhesive Sticky Again
Restoring safety can be done under the right circumstances, whether additional degradation is from heavy usage of the role, incorrect specification or blueprint for the application in question, or the gradual degrading consequence of weather.
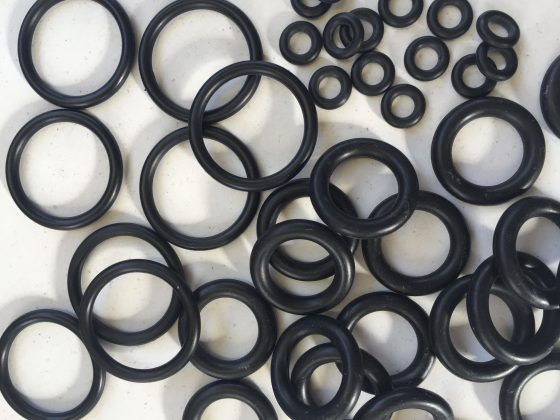
Safe, like many organic materials, has a definite shelf-life; 1 which depends on the type of safety in question, and which various exterior factors tin can speed up.Deterioration of rubber items can become significant over time, eventually leading to total failure of the rubber part which tin can of grade have potentially catastrophic consequences. This may hateful a pocket-sized inconvenience, or become a catastrophic event such as a seal failure assuasive fluid or pressure leakage, with either faults beingness immediately obvious, or, just every bit concerning, long term unnoticed deterioration of a vehicle or structure. But such impairment or weathering need not necessarily spell the end of life for a rubber seal or product, which can potentially be costly, or in practical terms, difficult to replace. With the right safe restoring techniques, and a sufficient level of care and maintenance, rubber seals or products of certain polymer types can often be brought back from the brink of failure and restored to functionality. Read on, and we'll testify you how to help your safety office alive a longer life, in easy to follow steps.
Select the platonic rubber restoring products
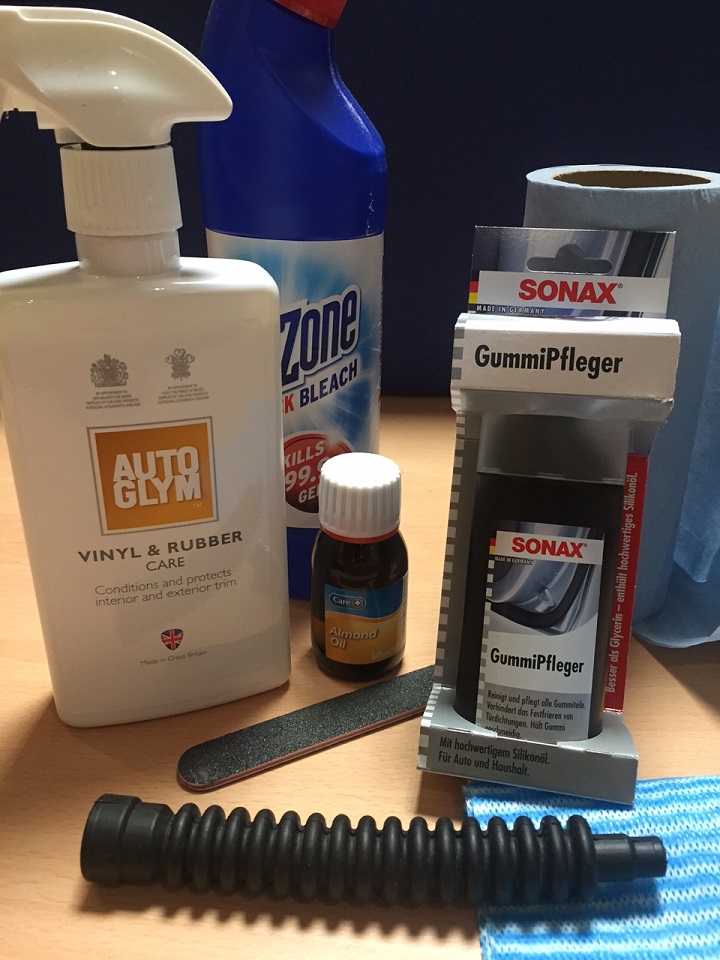
You can't do a good job without the right tools for the situation; in that location is a specially wide range of condom restoring products on the market, which can make information technology much harder to decide what is the all-time method and products to use. Fortunately, when restoring rubber seals, y'all can oft go very good results simply by using a combination of like shooting fish in a barrel to find household cleaning products, forth with a few more specialist products. Depending on the extent of the restoration you are dealing with, you will need some or all of these:
- A dry cotton fiber cloth
- Small-scale bristled brush
- Abrasive File
- Coarse and fine grades of Emery or Aluminium Oxide sanding cloth
- Diluted bleach (three measures of water to every ane of bleach) OR mild lather
- Protective gloves
- Protective flooring roofing
- Almond oil
- Rubber solvent (more often than not turpentine or naphtha (petroleum) based)
- Rubber conditioner (brand names such as Sonax, Wurth, Meguiars etc have suitable products)
- Cooking pot/bucket (you're non going to want to use this for cooking afterwards, so use an old or cheap option hither)
- Tongs
 Please note that non all of these may be needed to clean the particular rubber seal in question; a combination of some or all may exist required, depending on circumstances and the type of rubber involved. These products are virtually suitable for natural condom grades, while synthetic rubber types such as Neoprene, Nitrile, Viton and Silicone may require different products. Consult the literature relevant to the product yous are using, or call us for advice.
Preparation
 Get-go things beginning, clear any debris and detritus from the rubber item that you intend to restore. Ensure that you clean off any alkane series wax that has leached out of the condom as well; a miracle known as blooming that occurs more than as rubber ages. The condom solvent listed higher up makes the removal of whatsoever paraffin a lot easier though the wax may nevertheless have a little while to soften.
Initial scrub and clean
Next, it's a good thought to requite the rubber seal a good scrub; not only will cleaning off any excess dirt improve the seal aesthetically, but will help prevent future wear and tear every bit dirt chafes the prophylactic against mating surfaces over fourth dimension. Depending on how heavily soiled the safe is, you may need to employ unlike cleaning materials. For lighter levels of clay, warm water and a mild soap will be more than sufficient. Heavier levels of clay, or the presence of mould and mildew, will instead require the application of the diluted bleach mix that nosotros listed above. After giving the rubber a quick clean with the water and advisable cleaning substance, wash off the item and clean the rubber office down with the textile. Then allow the part to thoroughly dry.
Utilise a rubber conditioner
The specific safety conditioner you choose to use frequently a case of personal preference having checked the manufacturers production information; in one case you have made sure the product y'all are considering is suitable for your rubber parts, the last choice depends far more than on the availability of the product to you; most hardware stores or auto centres should exist able to provide a diverseness of rubber conditioners, and of course on-line shops can provide next 24-hour interval delivery in about countries! Rub the rubber conditioner thoroughly into the seal (apply a different cloth to the ane in the previous stage, so that you lot exercise non transfer dirt or cleaner back onto the safe!). Once information technology has been worked in, and the rubber is completely saturated, wipe off the excess conditioner. Rubber conditioners if spilt on the floor tin often go out a glace patch, use the floor covering to catch anything accidentally spilt as this may prevent a slip or fall!
Remove excessively damaged pieces of seal
Fifty-fifty with the most comprehensive techniques for restoring prophylactic, some seals may have areas of safe that are too far gone to be fully repaired; if the previous steps are unable to enliven them, information technology may be better for the overall function of the seal to remove suspect areas completely. The obvious caveat here is that, given the frequently extremely specific size of prophylactic seals; removing also much can make the seal useless! Do make sure that the rubber in question will still contact the required mating surface with sufficient appointment to function correctly. Depending on the precise circumstances, repairs with a super-mucilage or contact adhesive may rescue the part and provide farther useful service life. Use the file or abrasive Emery cloth to gently vitrify off and remove the damaged areas of rubber; yous will demand to be firm plenty to brand an impression, while existence careful enough to not remove excessive amounts. Once you have removed all the damaged sections, reapply rubber conditioner to the abraded areas to restore protection as per the previous pace.
Alternative methods
For smaller, lightly weathered safety seals, a simpler method is sometimes but as effective; boil some h2o in the saucepan, add a small amount of soap, and submerge the seal. Every 5 minutes or so, remove the seal using tongs and examination its flexibility and condition. The time taken for the rubber to be restored volition vary from instance to example, simply information technology tin be just as constructive, and less labour intensive than the previous method! Scrubbing smaller, lightly soiled safety seals with almond oil is also an effective, simple option, restoring lost flexibility and cleaning abroad dirt and grime.
The post Restoring damaged or weathered safety seals – a guide appeared first on Martin'southward Condom Company.
How to Make Windshield Gasgit Adhesive Sticky Again
Source: https://www.martins-rubber.co.uk/blog/restoring-damaged-or-weathered-rubber-seals-a-guide/